构建OpenStack镜像的环境搭建
虽然OpenStack官方文档上有提供了各类操作系统的OpenStack镜像,但我们往往需要根据实际情况进行一些自定义设置,因此本文主要介绍如何在自己的笔记本或台式机上通过VMware构建一个可以用于制作OpenStack镜像的环境,以便可以快速的制作自定义的OpenStack镜像。
环境介绍
| VMware版本 | 虚拟机操作系统 | 虚拟机规格 | 虚拟机IP | 网卡模式 | 镜像 | 镜像下载链接 |
|---|---|---|---|---|---|---|
| VMware WorkStation12 Pro | CentOS7.1 | 2核4G100G | 192.168.128.129 | NAT | CentOS-7-x86_64-Minimal-1503-01.iso | http://archive.kernel.org/centos-vault/ |
VMware虚拟机操作系统安装
此步请参考之前的文章如何在VMware下安装RedHat6.X虚拟机
说明
记得在VMware里将虚拟机处理器中的“虚拟化Intel VT-x/EPT 或 AMD-V/RVI(V)”选项勾选,开启嵌套虚拟化功能
初始化配置
1 | iptables -F |
安装epel源
到https://fedoraproject.org/wiki/EPEL/zh-cn下载对应操作系统版本的epel-release包的最新版本,然后上传到虚拟机并安装

1 | rpm -ivh epel-release-latest-7.noarch.rpm |
安装KVM
1 | yum install libcanberra-gtk2 qemu-kvm.x86_64 qemu-kvm-tools.x86_64 libvirt.x86_64 libvirt-cim.x86_64 libvirt-client.x86_64 libvirt-java.noarch libvirt-python.x86_64 dbus-devel virt-clone virt-manager libvirt libvirt-python -y |
修改网卡配置文件
修改网卡配置文件,重启网络服务,将虚拟机网卡桥接到br网桥上,此示例中虚拟机网卡名为eno16777736
说明
DEVICE、NAME、IPADDR、NETMASK、GATEWAY参数要根据实际情况进行修改
1 | cat > /etc/sysconfig/network-scripts/ifcfg-eno16777736 << EOF |
创建工作目录
1 | mkdir /tvm/ |
至此环境已经搭建完成,继续根据以下步骤启动一台虚拟机验证环境是否正常。
测试验证
上传虚拟机镜像
到https://download.cirros-cloud.net/下载任意版本的cirros镜像文件(例如cirros-0.4.0-x86_64-disk.img),并上传到/tvm目录下。如果你使用的镜像是qcow2格式的(可通过qemu-img info <image_name>查看file format字段确认镜像格式),先参考以下命令转换成raw格式的。
1 | qemu-img convert -f qcow2 cirros-0.4.0-x86_64-disk.img -O raw cirros-0.4.0-x86_64-disk.img.raw |
创建虚拟机XML文件并启动虚拟机
创建虚拟机XML文件
1 | touch /tvm/templates.xml |
文件内容如下:
参数说明
<name>koenli</name>:自定义虚拟机名称<vcpu>2</vcpu>:自定义CPU核数<memory>4194304</memory>:自定义内存大小(单位byte)
1 | <domain type='kvm'> |
在下图红色方框处指定虚拟机镜像文件绝对路径,如果需要给虚拟机挂载光驱,则在红色箭头处指定ISO文件绝对路径。

配置完成后执行以下命令启动虚拟机
1 | cd /tvm/ |
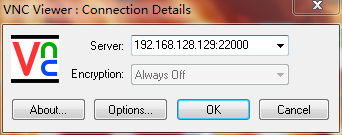
通过VNC Viewer连接到虚拟机
- VNC Viewer官网下载:https://www.realvnc.com/en/connect/download/viewer/
- VNC Viewer微云链接:https://pan.baidu.com/s/1zx6P5IqbXZ7BKfoqtcqL0g 提取码:7q5i
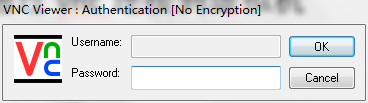
| 连接地址 | VNC密码 |
|---|---|
| 192.168.128.129:22000 | 123456 |